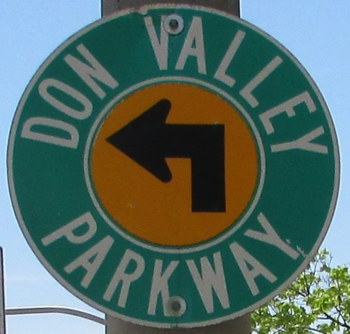
Don Valley Parkway
Toronto
 |
The DVP proceeds north-south connecting the Gardiner to the 401 before proceeding north as 404. Click here to show the route. |
;)
Pictures are arranged south to north.
| Location | Description | Photo
| ||
| City of Toronto |
Northbound view passing under a rail line.  Photograph taken in April 2018. |
;) |
||
| City of Toronto |
Northbound view showing the first marker past the Gardiner Expressway. Photograph taken in April 2018. |
;) |
||
| City of Toronto |
Northbound view passing under Eastern Avenue. Photograph taken in April 2018. |
;) |
||
| City of Toronto |
Eastbound view on Eastern Avenue showing the advance signage for the northbound DVP on-ramp. Photograph taken in April 2022. |
;) |
||
| City of Toronto |
Southbound view from atop the overpass at Eastern Avenue. Photograph taken in April 2022. |
;) |
||
| City of Toronto |
Northbound view passing under Queen Street. Photograph taken in April 2018. |
;) |
||
| City of Toronto |
Southbound view from atop the overpass at Queen Street. Photograph taken in January 2016. |
;) |
||
| City of Toronto |
Westbound view on Queen Street at the turnoff to northbound DVP. Photograph taken in January 2016. |
;) |
||
| City of Toronto |
Northbound view on Davies Avenue at the on-ramp for northbound DVP. Photograph taken in January 2016. |
;) |
||
| City of Toronto |
Eastbound view on Queen Street at the turnoff to northbound DVP. Photograph taken in January 2016. |
;) |
||
| City of Toronto |
Northbound view from atop the overpass at Queen Street. Photograph taken in January 2016. |
;) |
||
| City of Toronto |
Northbound view passing under Dundas Street. Photograph taken in April 2018. |
;) |
||
| City of Toronto |
Northbound view from atop the overpass at Dundas Street. Photograph taken in January 2016. |
;) |
||
| City of Toronto |
Northbound view passing under Gerrard Street. Photograph taken in April 2018. |
;) |
||
| City of Toronto |
Southbound view from atop the overpass at Gerrard Street. Photograph taken in March 2018. |
;) |
||
| City of Toronto |
Northbound view from atop the overpass at Gerrard Street. Photograph taken in March 2018. |
;) |
||
| City of Toronto |
Southbound view from atop the pedestrian bridge linking the two halves of Riverdale Park. Photograph taken in March 2018. |
;) |
||
| City of Toronto |
Northbound view from atop the pedestrian bridge linking the two halves of Riverdale Park. Photograph taken in March 2018. |
;) |
||
| City of Toronto |
Northbound view showing the advance signage for the Bayview Avenue/Bloor Street exit. Photograph taken in April 2018. |
;) |
||
| City of Toronto |
Northbound view passing under Bloor Street. Photograph taken in April 2018. |
;) |
||
| City of Toronto |
Northbound view showing the marker past Bloor Street. Photograph taken in April 2018. |
;) |
||
| City of Toronto |
Northbound view approaching the Bayview Avenue/Bloor Street exit. Photograph taken in April 2018. |
;) |
||
| City of Toronto |
Northbound view passing the Bayview Avenue/Bloor Street exit showing the 3 km advance signage for the Don Mills Road exit. Photograph taken in April 2018. |
;) |
||
| City of Toronto |
Northbound view past the Bayview Avenue/Bloor Street exit. Photograph taken in April 2018. |
;) |
||
| City of Toronto |
Northbound view past the Bayview Avenue/Bloor Street exit. Photograph taken in April 2018. |
;) |
||
| City of Toronto |
Eastbound view passing under Millwood Road. Photograph taken in April 2018. |
;) |
||
| City of Toronto |
Eastbound view approaching the Don Mills Road exits. Photograph taken in April 2018. |
;) |
||
| City of Toronto |
Eastbound view approaching the Don Mills Road South exit. Photograph taken in April 2018. |
;) |
||
| City of Toronto |
Northbound view approaching the Don Mills Road North exit. Photograph taken in April 2018. |
;) |
||
| City of Toronto |
Northbound view approaching the Don Mills Road North exit. Photograph taken in April 2018. |
;) |
||
| City of Toronto |
Northbound view past the Don Mills Road exits. Photograph taken in April 2018. |
;) |
||
| City of Toronto |
Northbound view past the Don Mills Road exits. Photograph taken in April 2018. |
;) |
||
| City of Toronto |
Northbound view passing under Spanbridge Road. Photograph taken in April 2018. |
;) |
||
| City of Toronto |
Northbound view approaching the Eglinton Avenue exit. Photograph taken in April 2018. |
;) |
||
| City of Toronto |
Northbound view passing over St. Dennis Drive. Photograph taken in April 2018. |
;) |
||
| City of Toronto |
Northbound view at the Eglinton Avenue exit. Photograph taken in April 2018. |
;) |
||
| City of Toronto |
Northbound view passing the Eglinton Avenue exit showing the advance signage for the Lawrence Avenue exits. Photograph taken in April 2018. |
;) |
||
| City of Toronto |
Northbound view passing over Eglinton Avenue. Photograph taken in April 2018. |
;) |
||
| City of Toronto |
Northbound view passing under Wynford Drive. Photograph taken in April 2018. |
;) |
||
| City of Toronto |
Northbound view passing under a rail line. Photograph taken in April 2018. |
;) |
||
| City of Toronto |
Northbound view passing under a rail line. Photograph taken in April 2018. |
;) |
||
| City of Toronto |
Northbound view approaching the Lawrence Avenue exits. Photograph taken in April 2018. |
;) |
||
| City of Toronto |
Northbound view approaching the Lawrence Avenue exits. Photograph taken in April 2018. |
;) |
||
| City of Toronto |
Northbound view approaching the Lawrence Avenue east exit. Photograph taken in April 2018. |
;) |
||
| City of Toronto |
Northbound view approaching the Lawrence Avenue west exit. Photograph taken in April 2018. |
;) |
||
| City of Toronto |
Northbound view passing under Lawrence Avenue. Photograph taken in April 2018. |
;) |
||
| City of Toronto |
Westbound view on Lawrence Avenue showing the advance signage for the turnoff to northbound DVP. Photograph taken in May 2016. |
;) |
||
| City of Toronto |
Westbound view on Lawrence Avenue at the turnoff to northbound DVP. Photograph taken in May 2016. |
;) |
||
| City of Toronto |
Westbound view on Lawrence Avenue at the turnoff to southbound DVP. Photograph taken in May 2016. |
;) |
||
| City of Toronto |
Northbound view from atop the overpass at Lawrence Avenue. Photograph taken in May 2016. |
;) |
||
| City of Toronto |
Northbound view approaching the Lawrence Avenue west exit. Photograph taken in April 2018. |
;) |
||
| City of Toronto |
Northbound view showing the marker past the Lawrence Avenue exits. Photograph taken in April 2018. |
;) |
||
| City of Toronto |
Northbound view showing past the Lawrence Avenue exits. Photograph taken in April 2018. |
;) |
||
| City of Toronto |
Northbound view approaching the York Mills Road exit. Photograph taken in April 2018. |
;) |
||
| City of Toronto |
Northbound view passing over Brookbanks Drive. Photograph taken in April 2018. |
;) |
||
| City of Toronto |
Northbound view approaching the York Mills Road exit. Photograph taken in April 2018. |
;) |
||
| City of Toronto |
Northbound view passing over York Mills Road. Photograph taken in April 2018. |
;) |
||
| City of Toronto |
Northbound view approaching the 401/404 interchange. Photograph taken in April 2018. |
;) |
||
| City of Toronto |
Northbound view approaching the exit for 401 east. Photograph taken in April 2018. |
;) |
||
| City of Toronto |
Northbound view taking the exit for 401 east. Photograph taken in April 2018. |
;) |
||
© Curtis Walker. All rights reserved. All pictures used on this site are the property of the respective photographers and are used by permission. No picture may be used without the consent of the respective photographer.
All pictures taken by Curtis Walker unless otherwise noted.